The latest hair tips, tricks and hacks are all over your for you page, but how often do you actually use them? If you’re always meaning to but never get around to it, this is your sign to start!
Here are four different ways to quickly and easily do something new with your hair by pairing the humble pony with an accessory: these step-by-step claw clip ponytail tutorials are perfect to get you started.
1. Claw Clip Ponytail
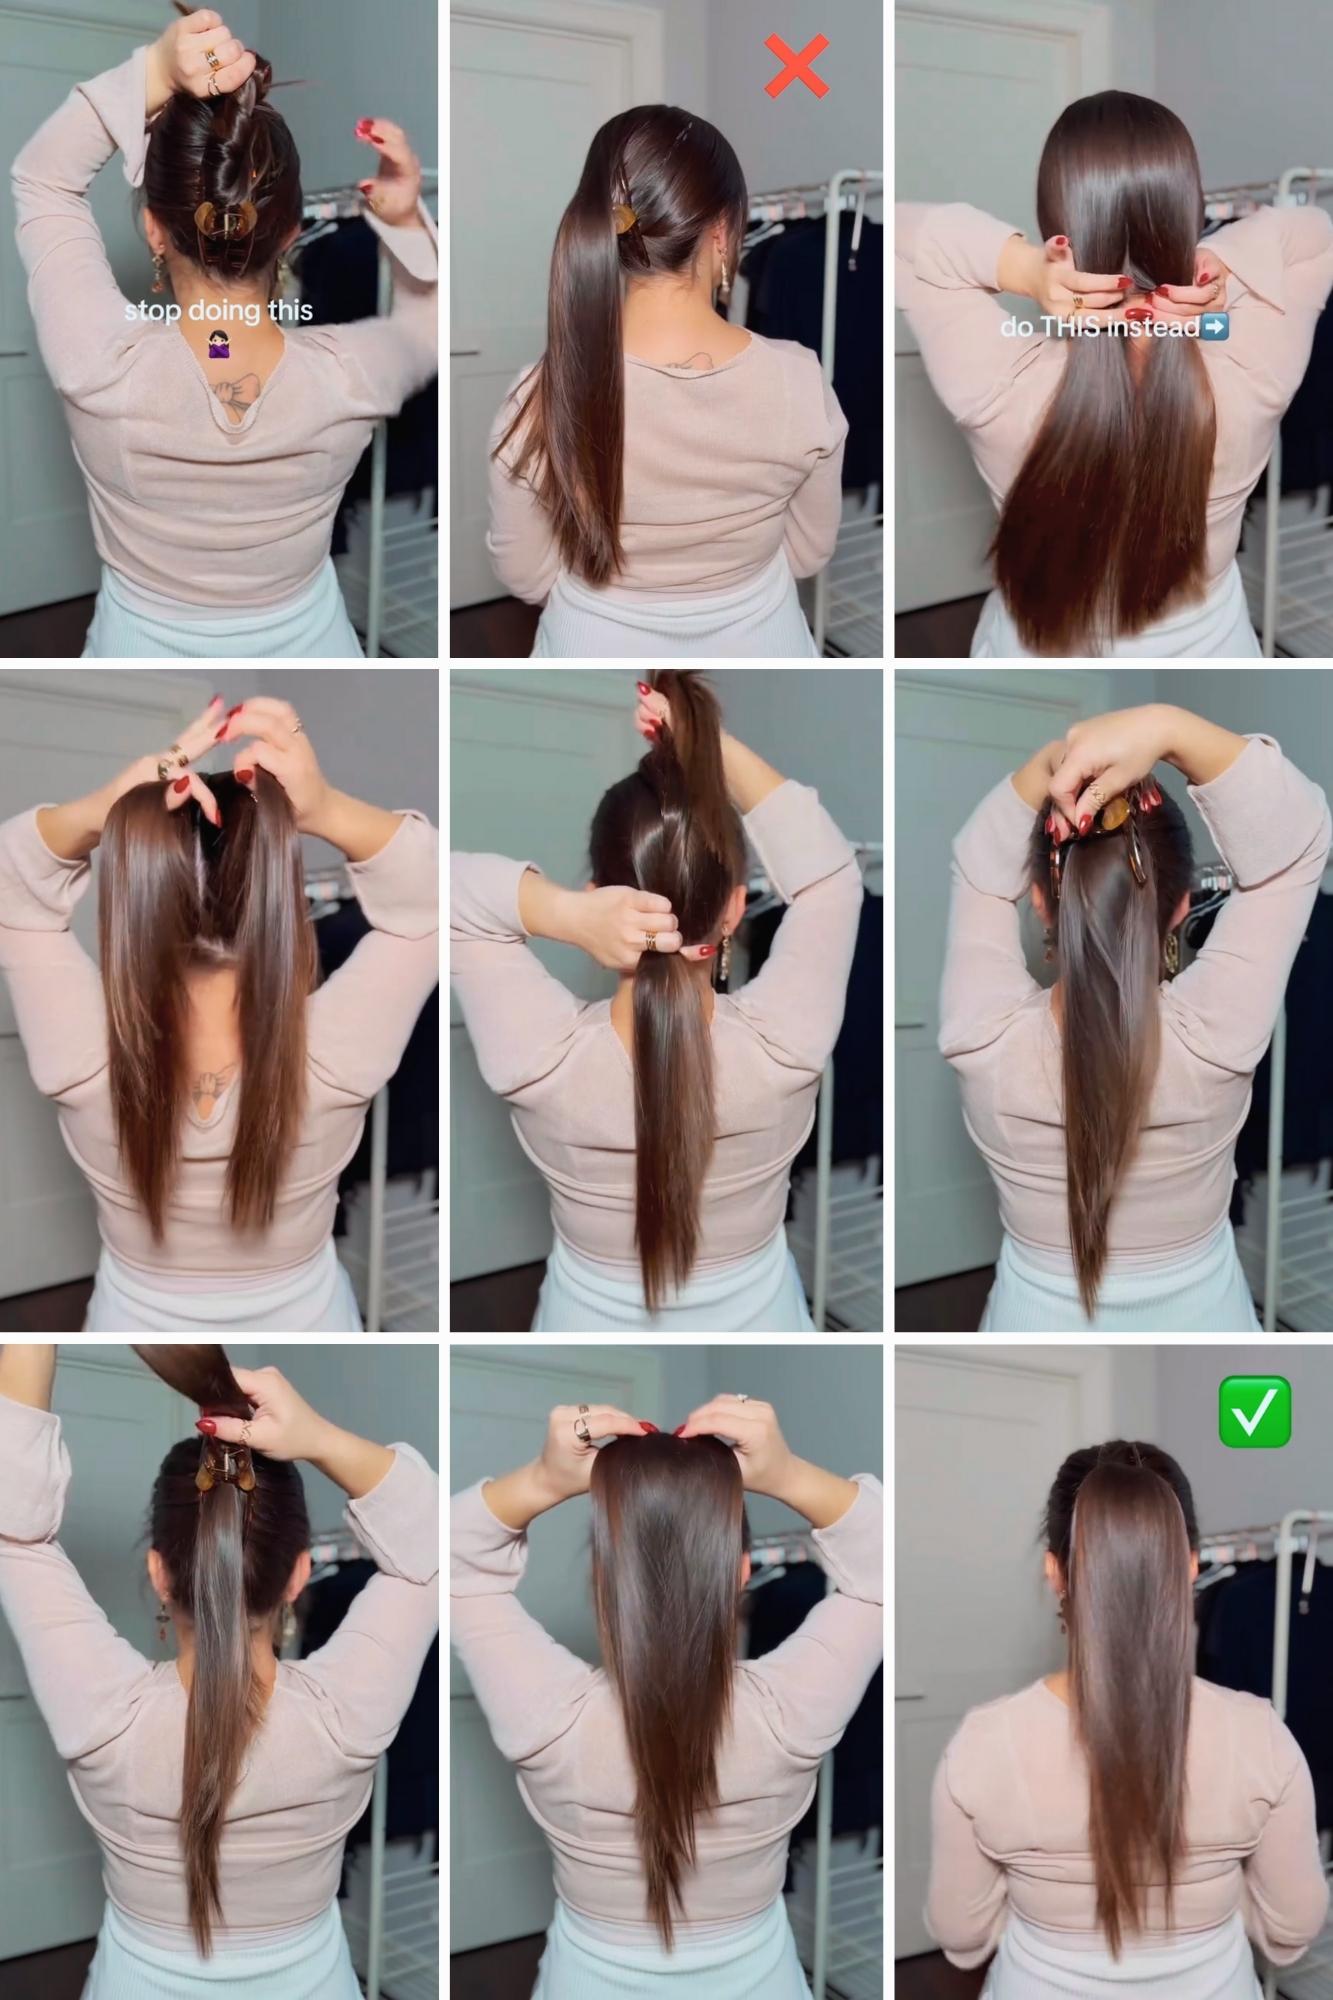
The one that lasts all day
Related: -17 Insta-Worthy Braided Ponytails You’ll Want To Try ASAP
A voluminous ponytail with zero drooping that lasts all day long without the need for touch-ups? Yes, please.
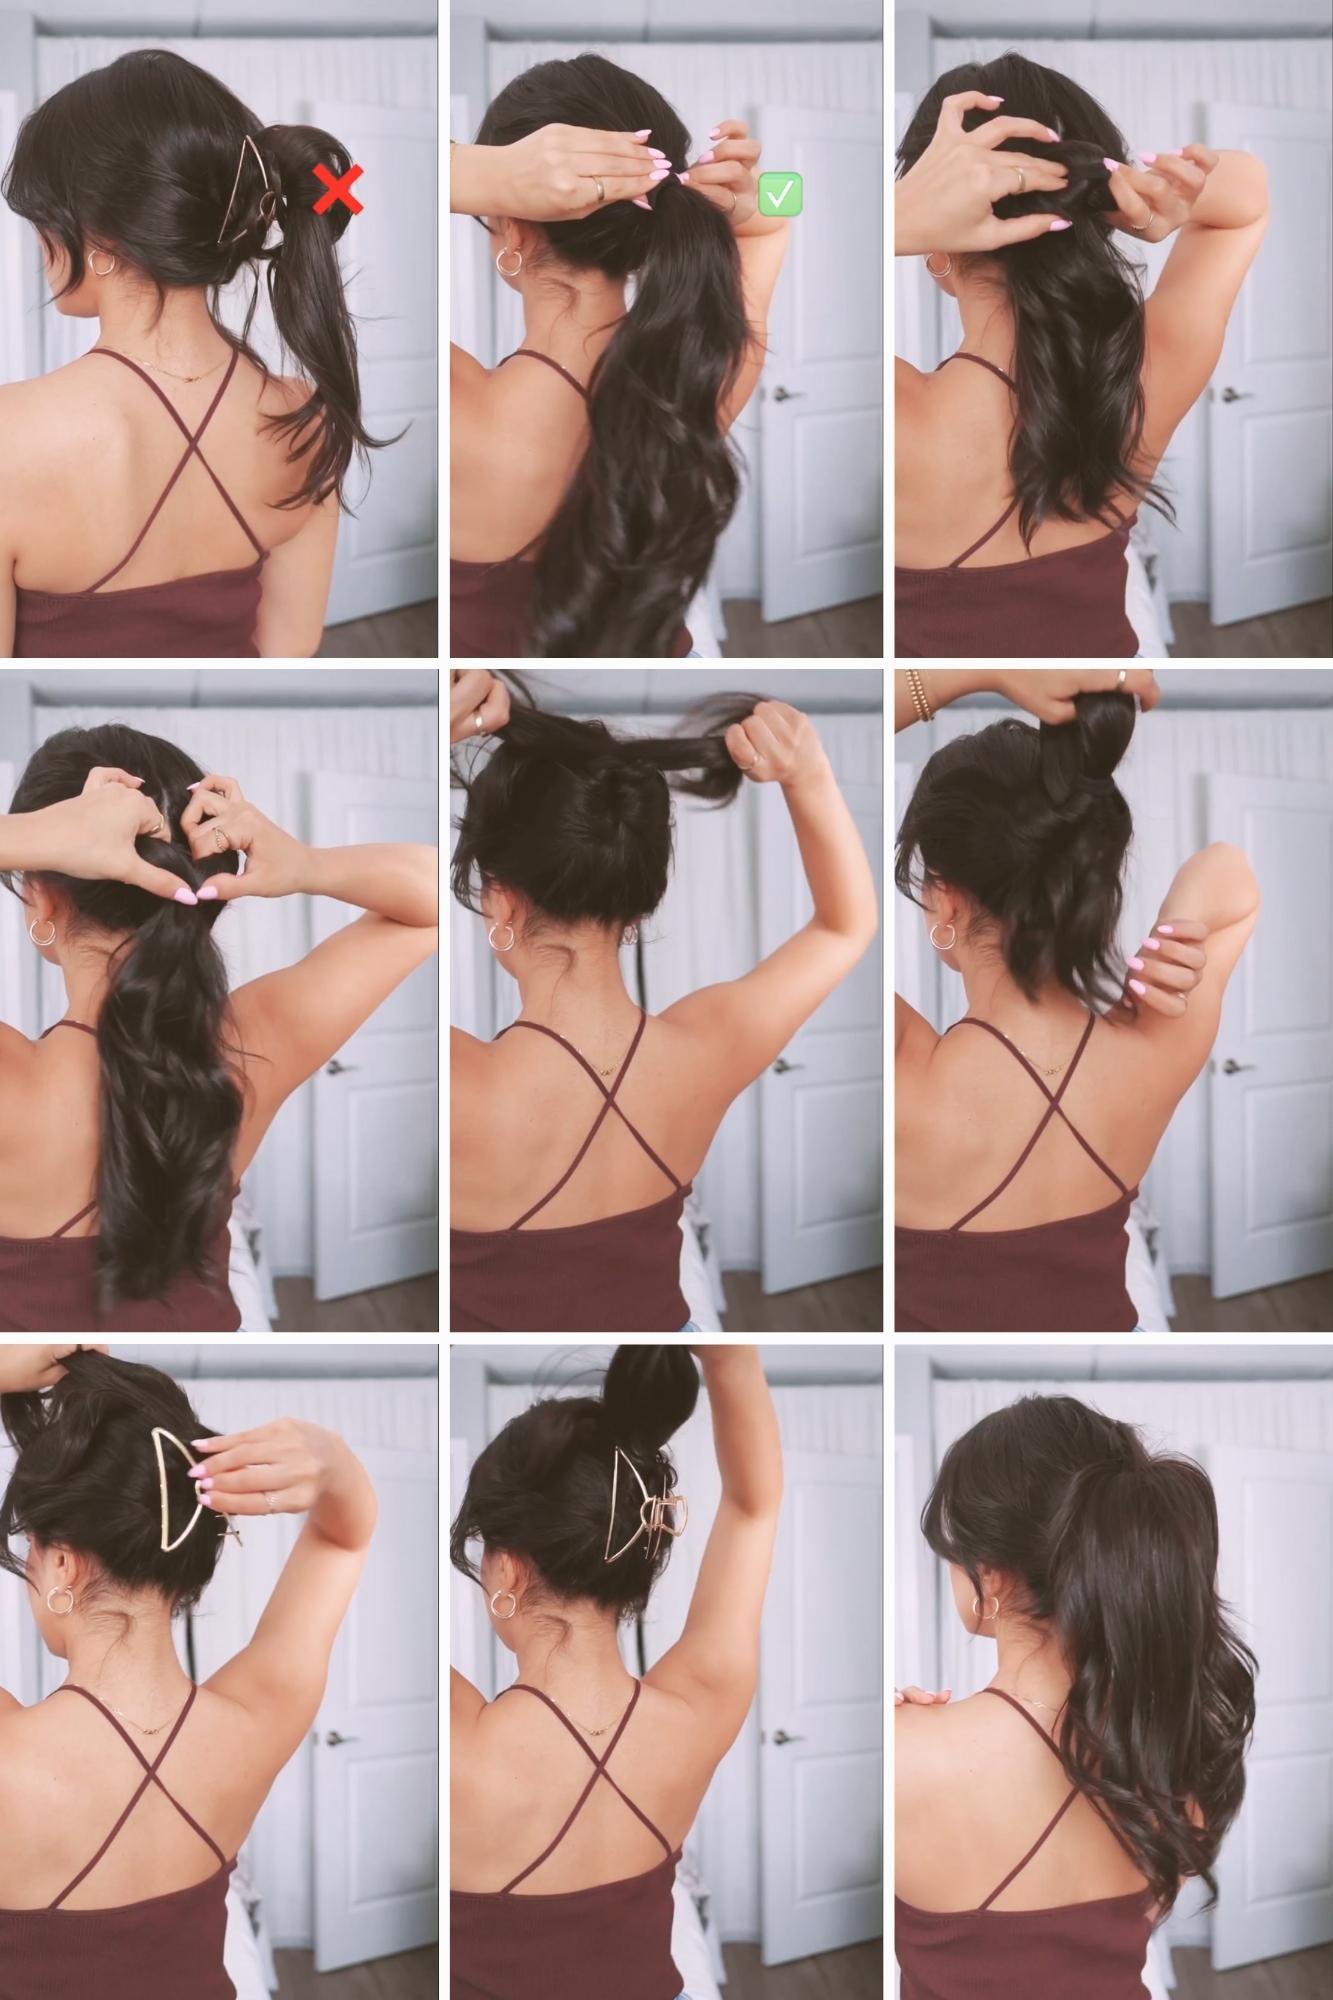
You’ll need a bristle brush, a hair elastic and, of course, a claw clip. Try out these steps to achieve a flawless, voluminous ponytail that stays put throughout the day.
- Start by combing through your hair to ensure it’s free of knots.
- Pull your hair into a ponytail at the middle of your head and secure it with an elastic. Smooth any flyaways with a bristle brush. (This method also works great with a low pony.)
- Using your fingers, create a hole in the upper half of the ponytail. Next, flip the bottom half of the ponytail through the hole.
- Place a claw clip underneath at the base of your ponytail, allowing your hair to fall over the top.
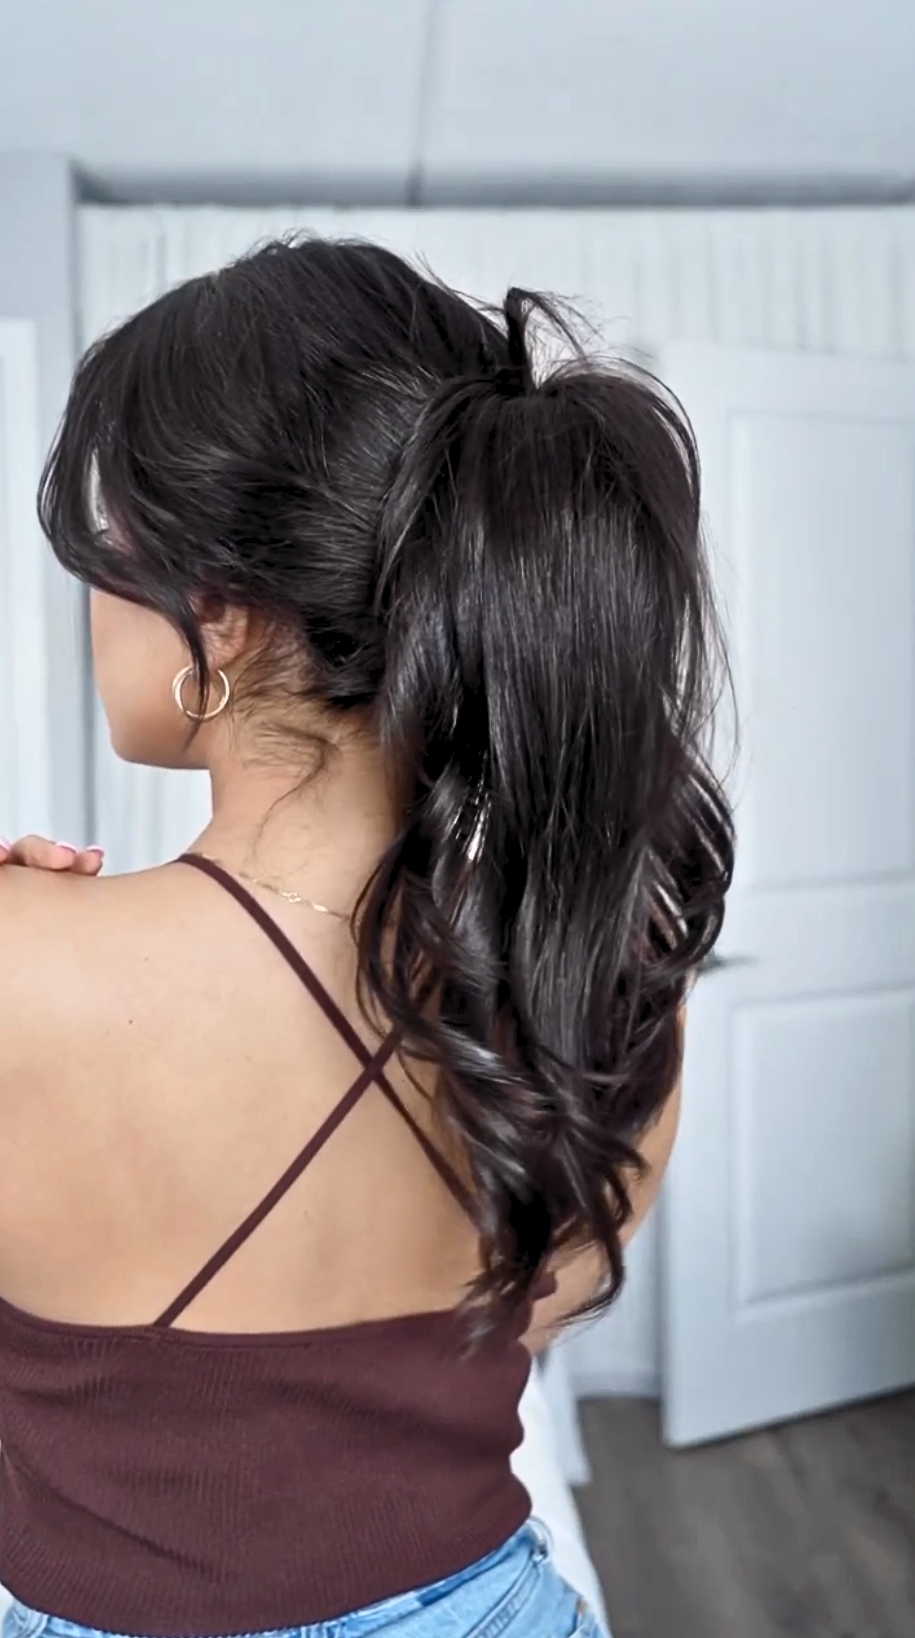
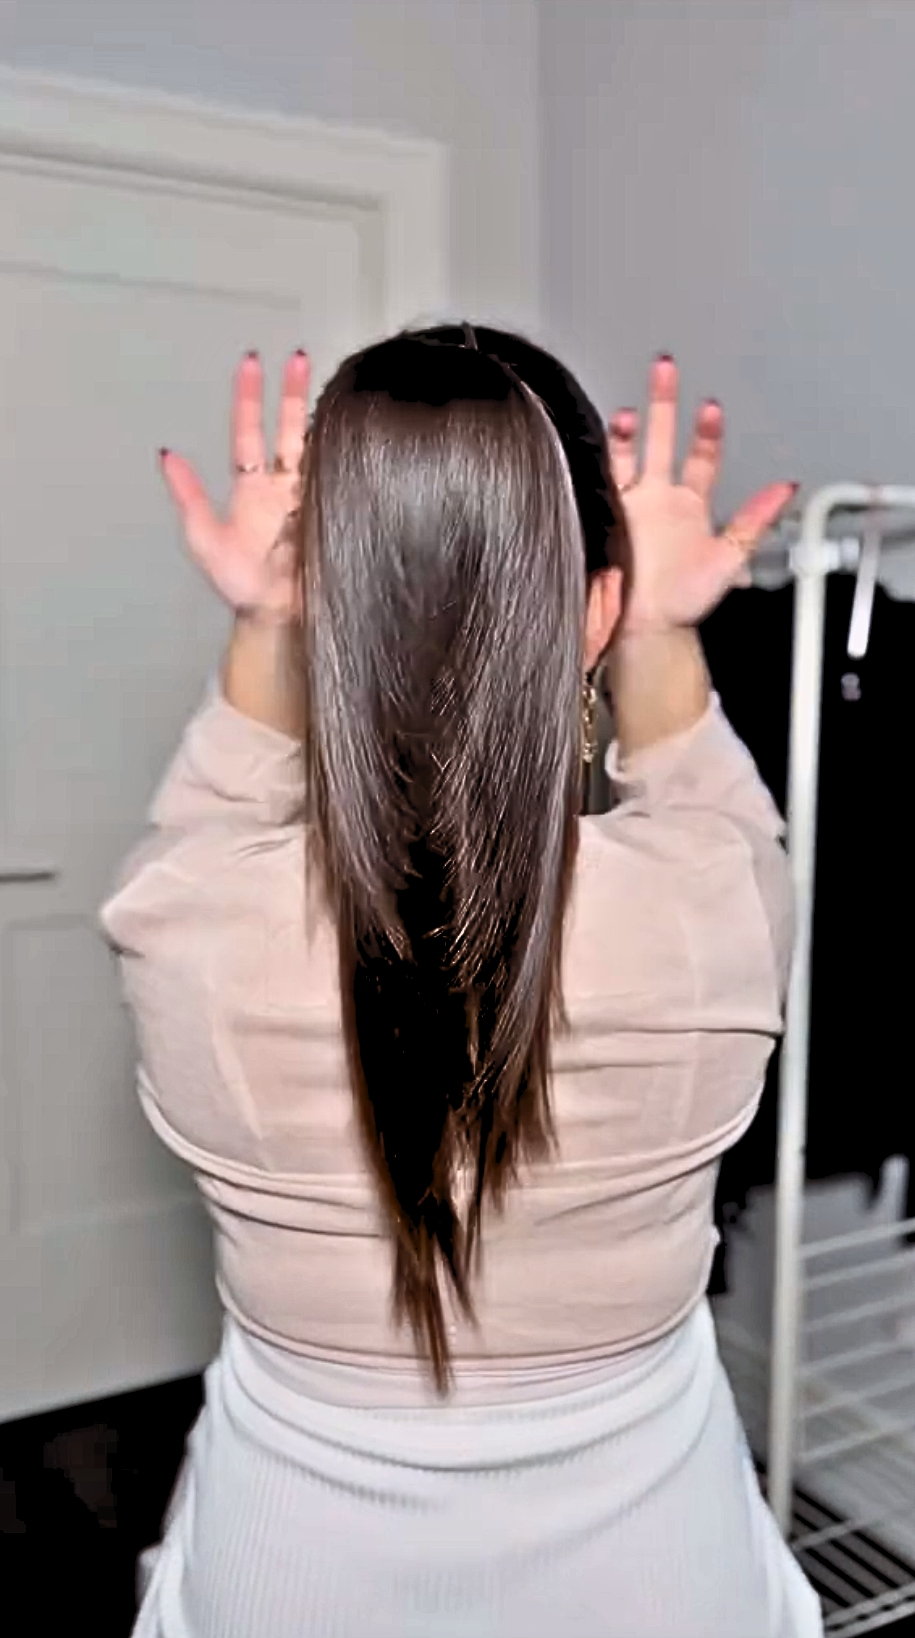
And here’s the final look.
2. Voluminous Claw Clip Ponytail
The easiest one (but you need long, thick hair)
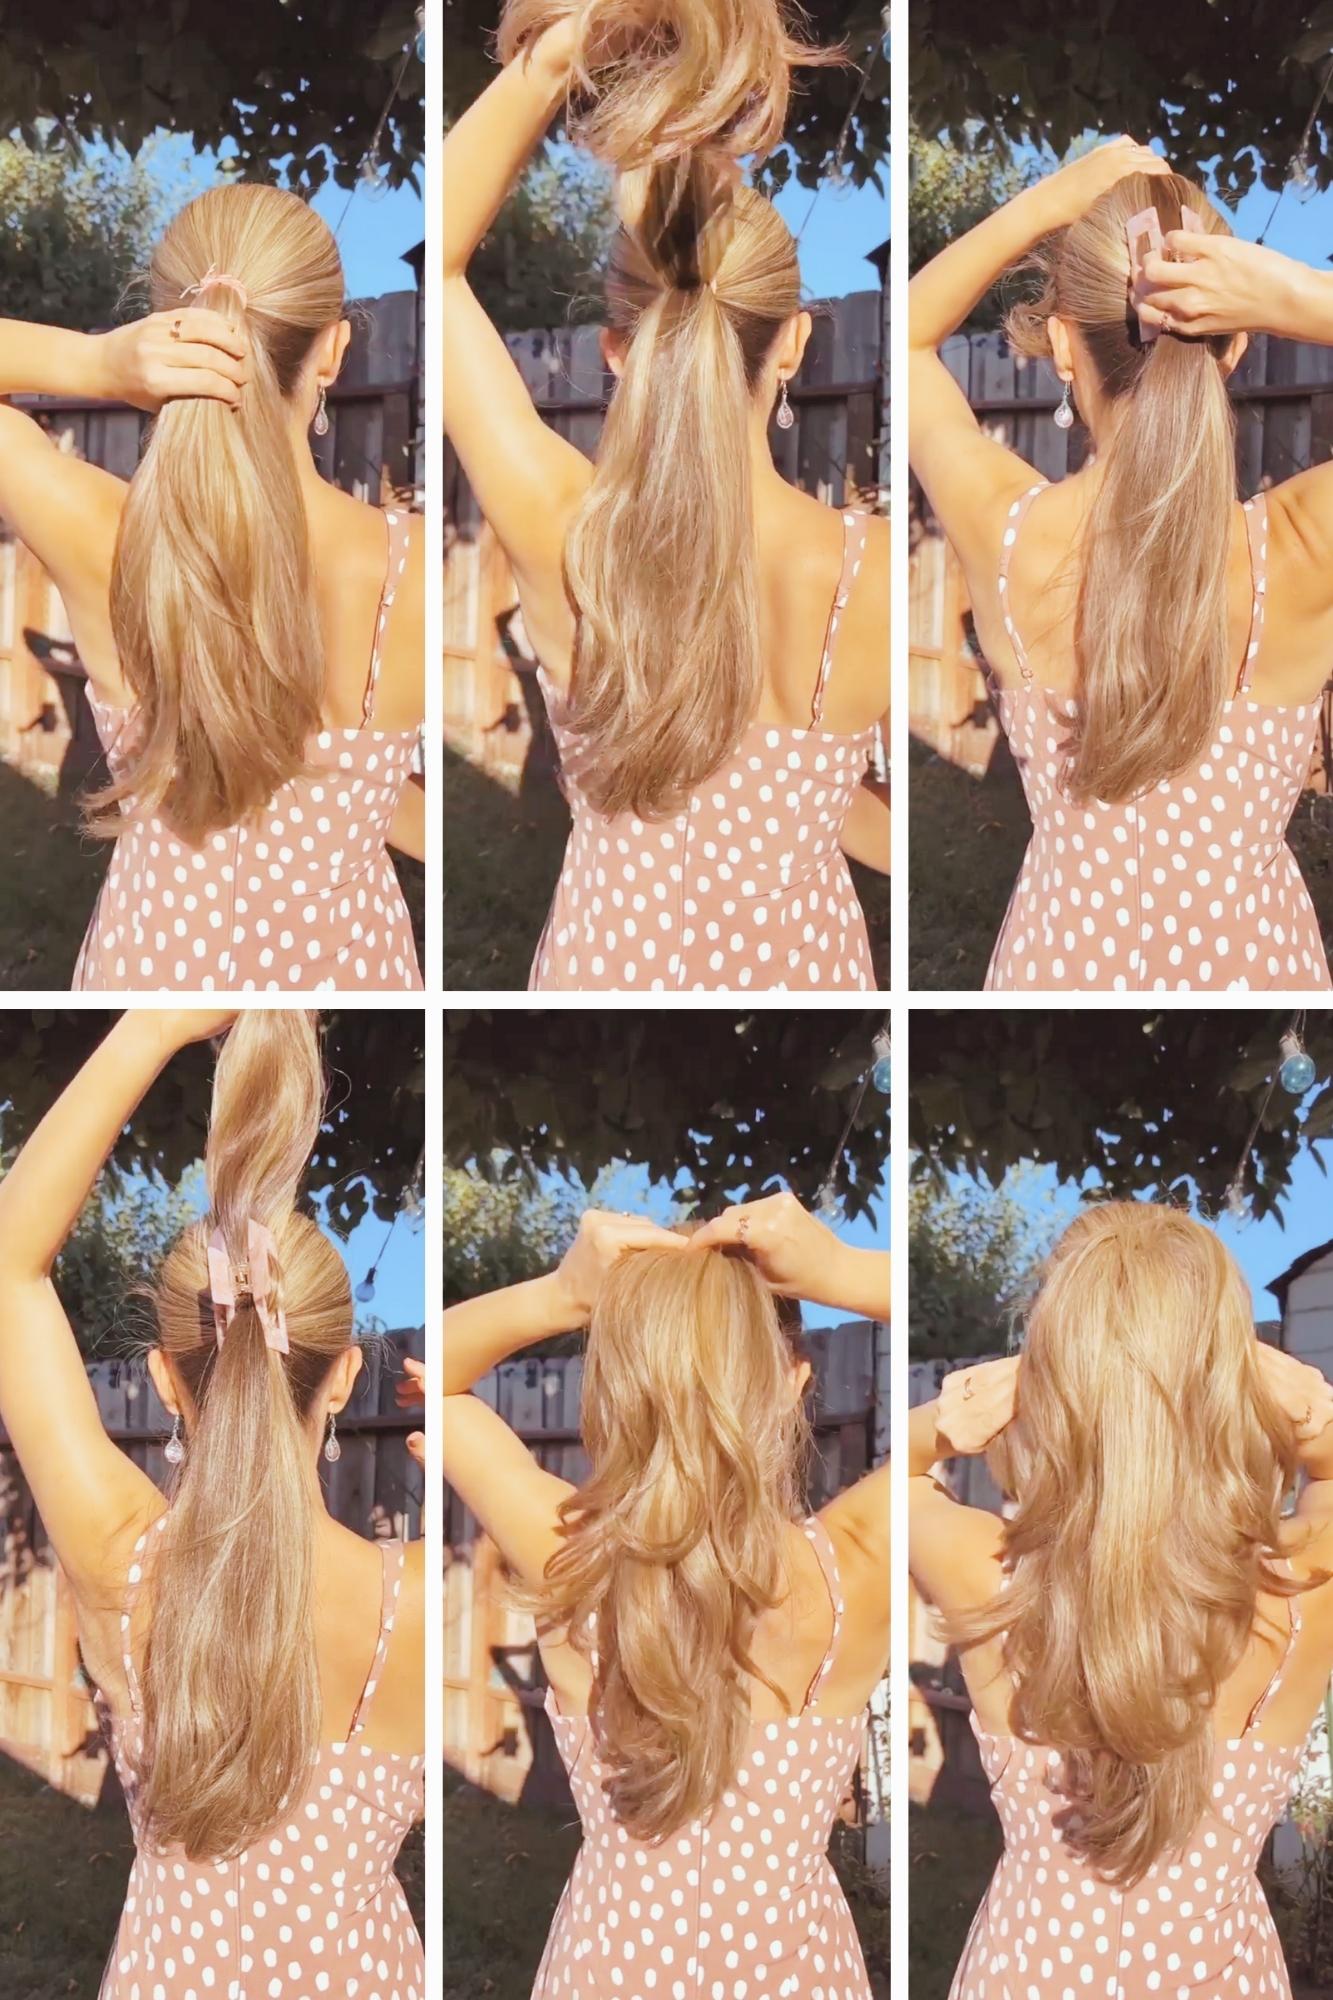
The tools you need are a hair tie and a claw clip, brush optional. This look can range from casual to fancy, depending on how smooth or loose you get with it.
- Start by putting your hair up into a regular ponytail. Use an elastic band to secure it in place.
- Separate your ponytail into two sections: the top half and the bottom half.
- Lift the top section upwards over your head and towards your face. This step adds volume to your ponytail.
- Place a claw clip over the lower part of the lifted section, ensuring it covers both the lower and upper portions.
- Let your hair to cascade over the top of the clip, creating a seamless waterfall effect.
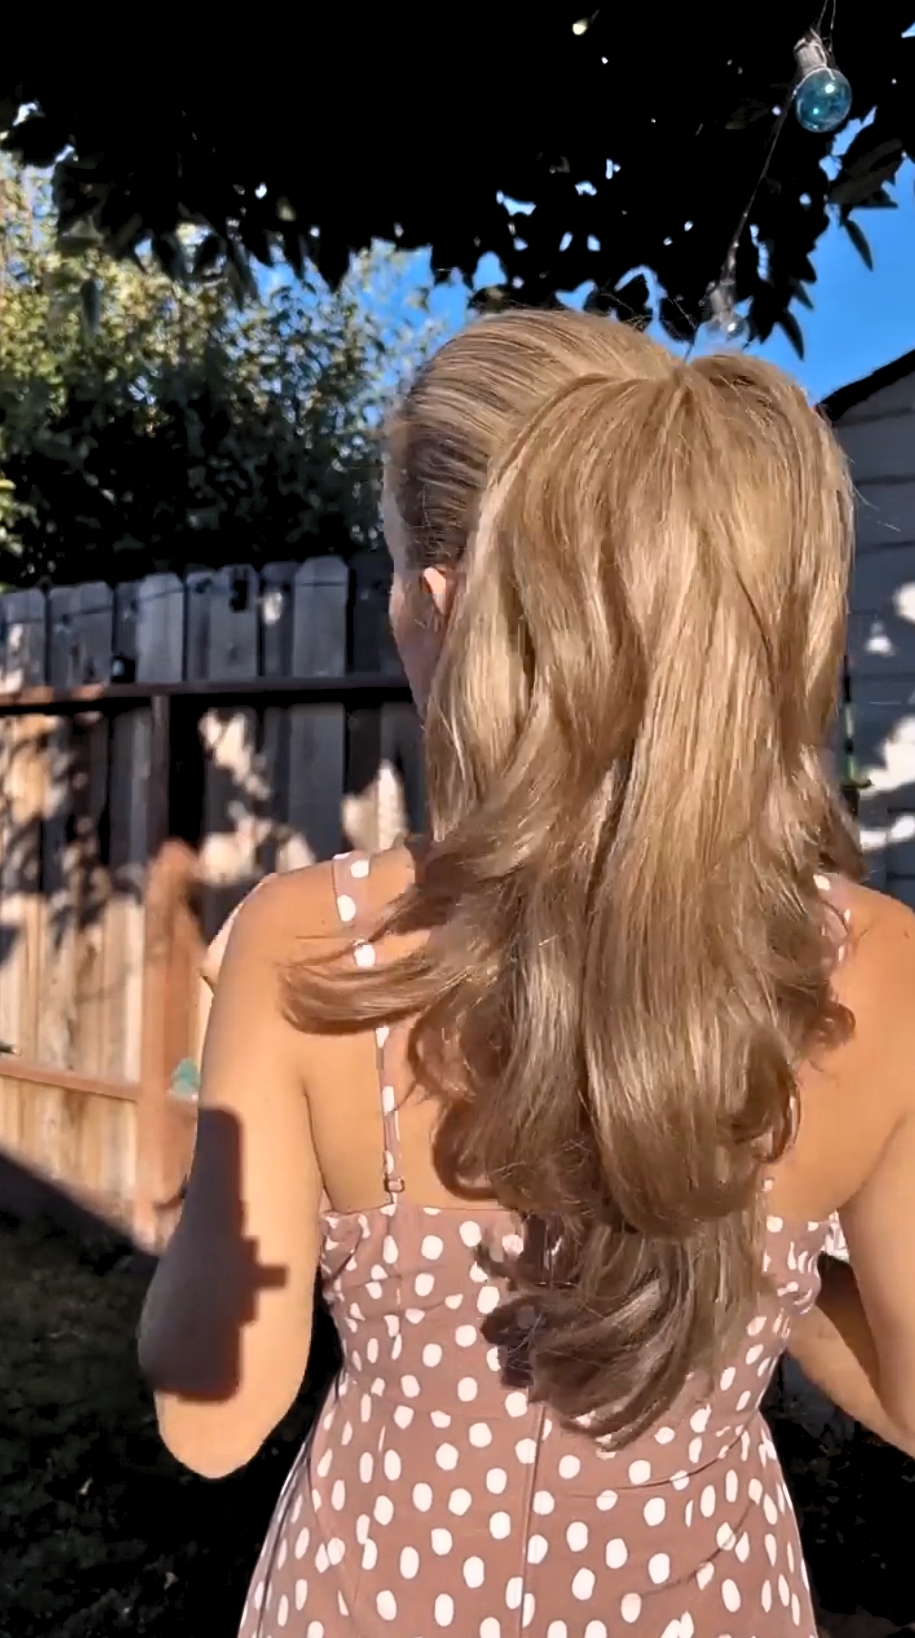
This is how it looks when you’re done.
3. Claw Clip Hack
If you only have a claw clip at hand
This style works exceptionally well when your tresses are long enough to completely cover the clip. Here’s a step-by-step tutorial for an elevated claw clip ponytail look:
- Start by separating your hair into two sections down the middle, the right half and the left half.
- Take both sections and twist the right half over the left half moving it down while lifting the other side up towards your face.
- Place a claw clip at the center where the two sections intersect, ensuring it covers both the lower and upper portions. This step adds volume and ensures a secure hold.
- Allow the top part to fall over the top of the clip, creating a seamless and voluminous effect.
This is what it looks like in the end.
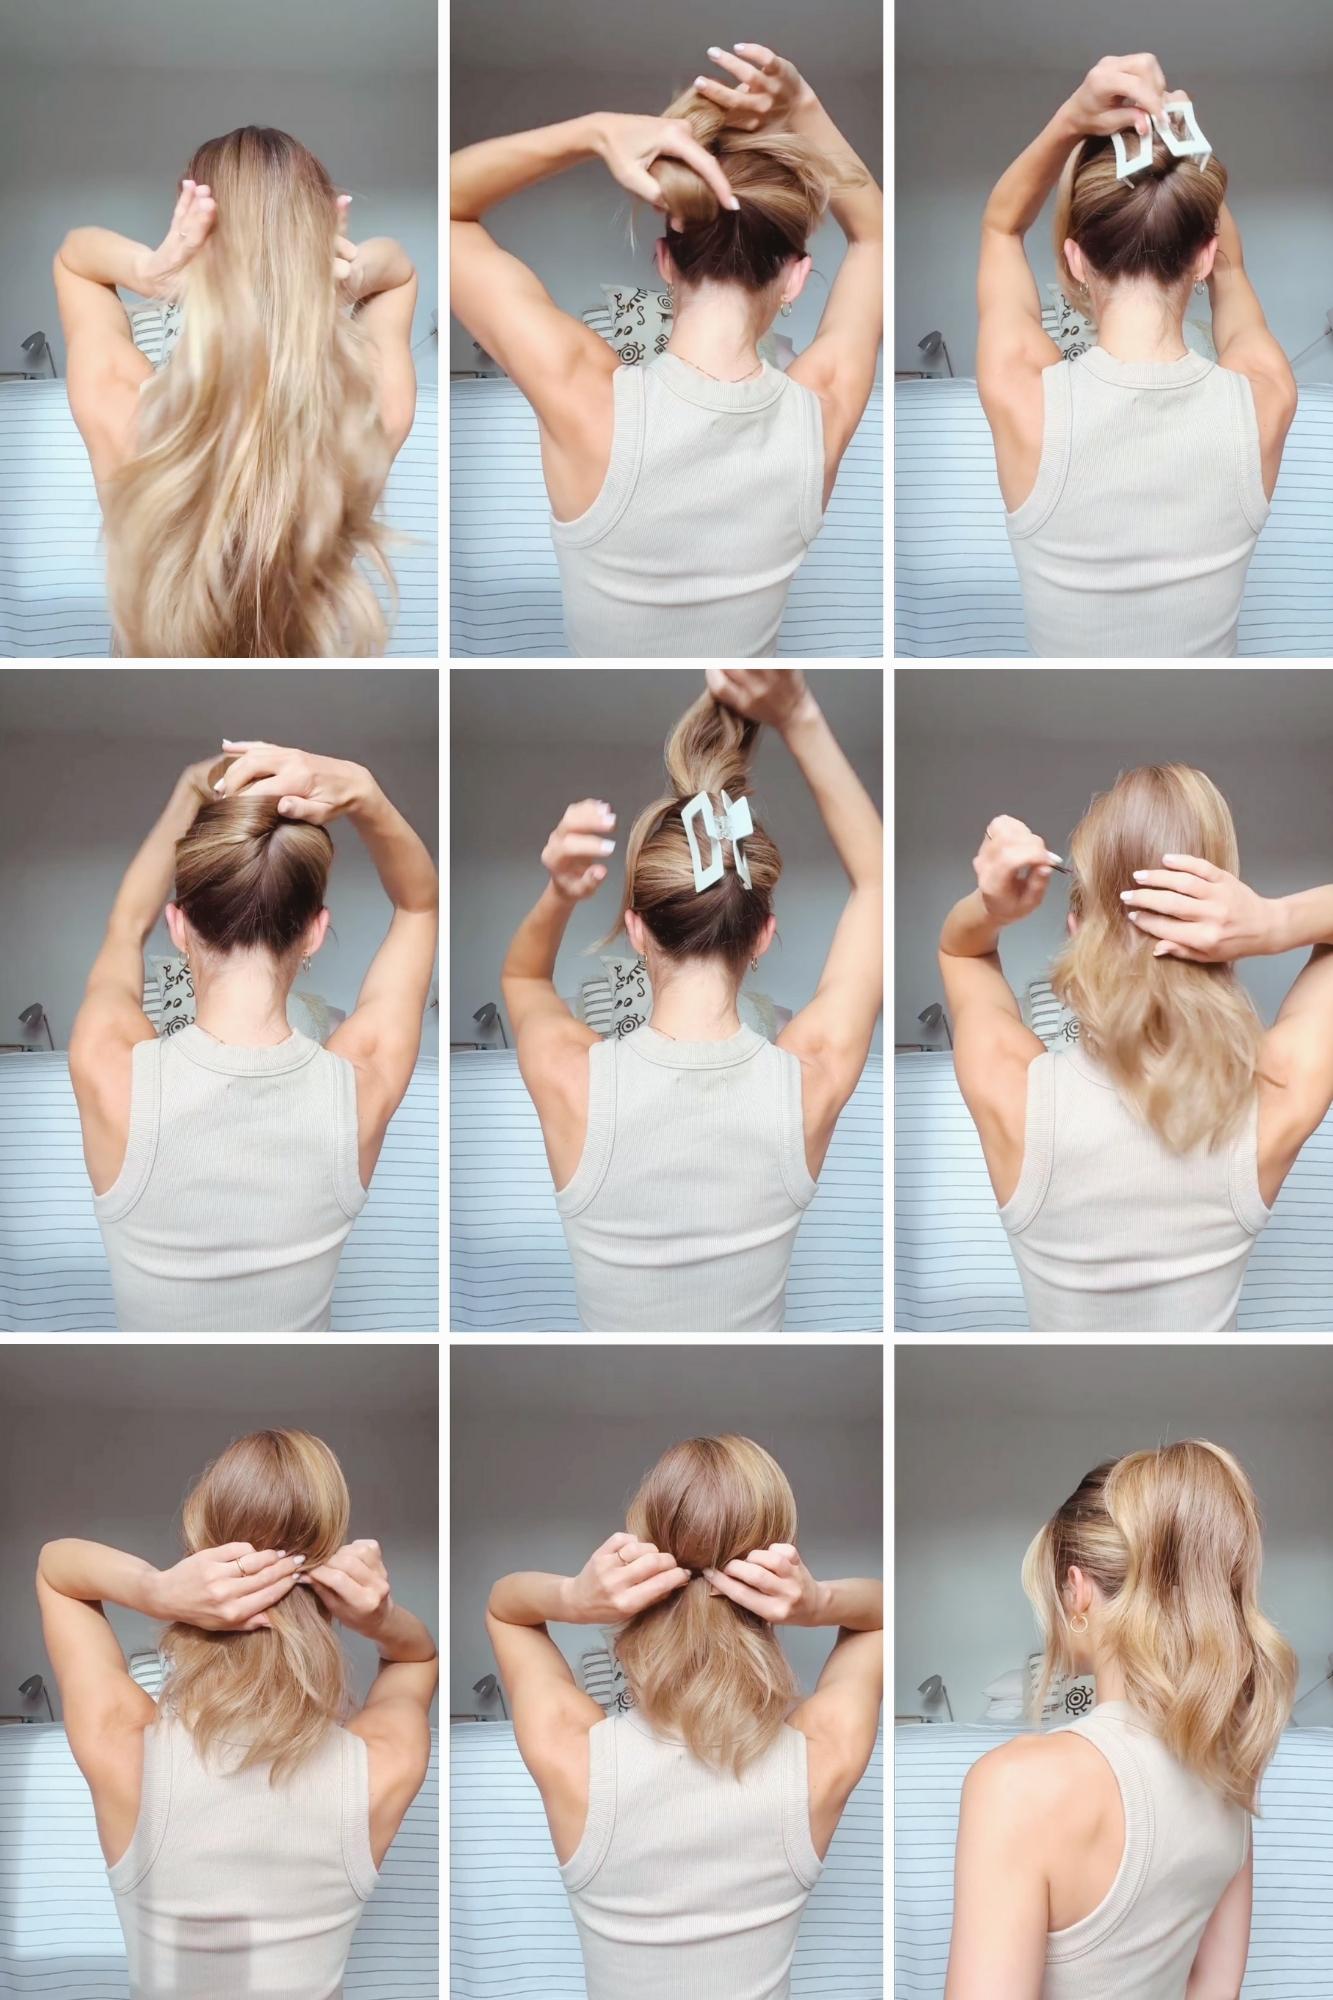
4. ’90s Claw Clip Updo For Thick Hair
The fancy one
This easy and beautiful updo requires a claw clip and some bobby pins. You’ll get the best results if your hair has some texture, so use dry shampoo, a texturizing product or some hairspray before you start.
- Gather your hair at the nape and twist upward two-three times until you reach the desired height—the middle of the head works best. Leave some face-framing strands loose to really go for a ’90s look.
- Secure the twist with a claw clip.
- Release your ponytail and let it cover the claw clip.
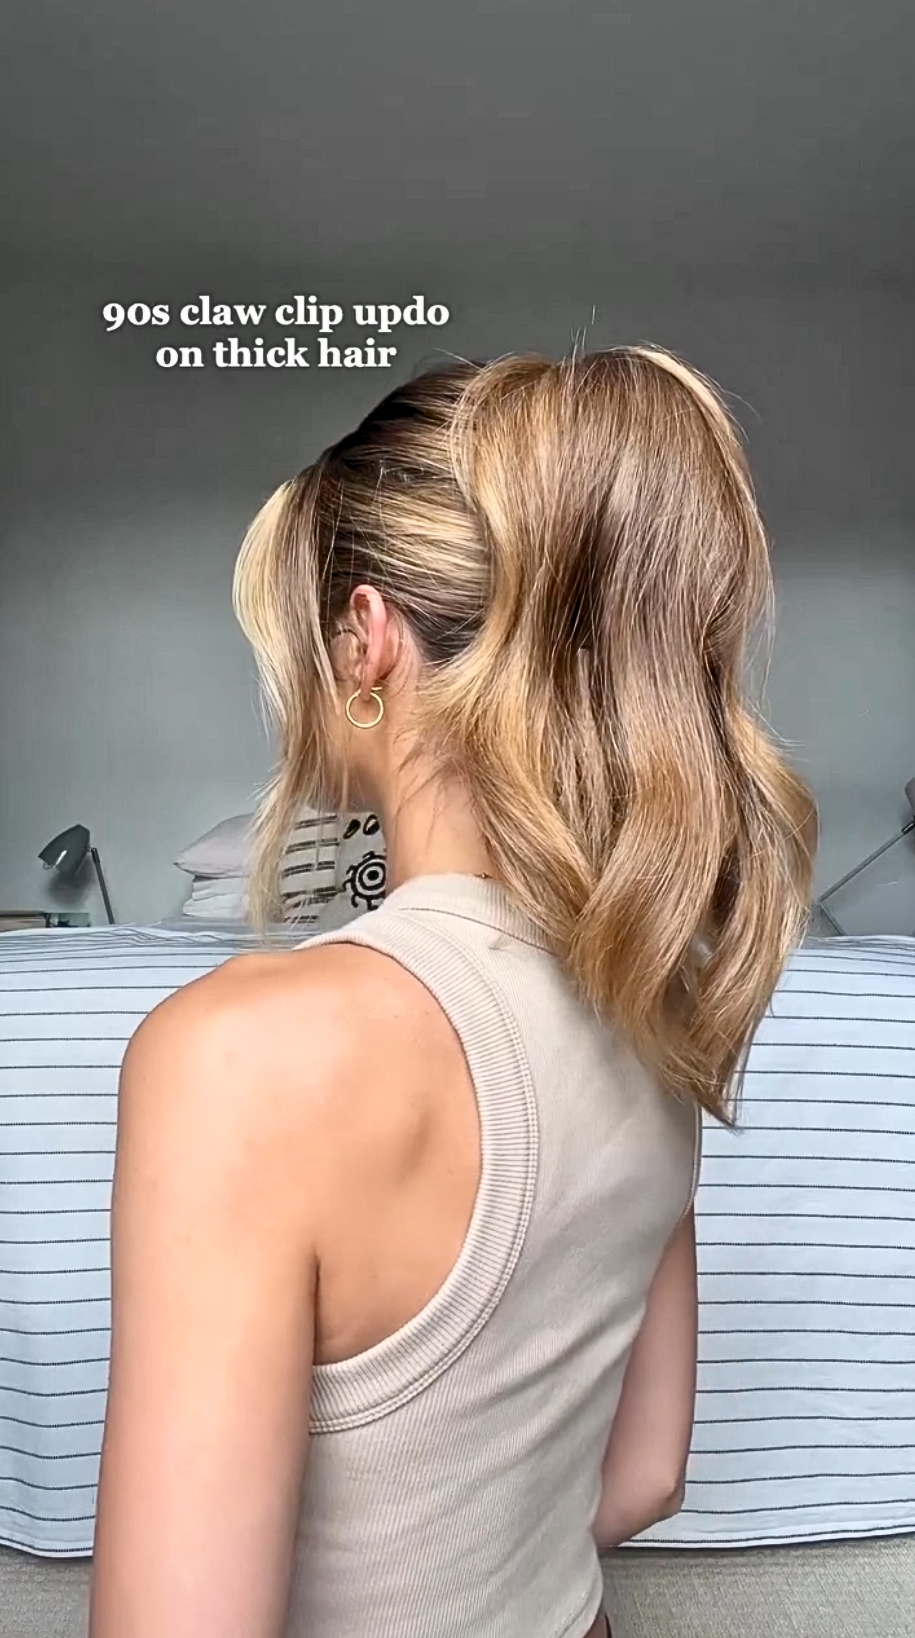
- Arrange your hair over the claw clip using the bobby pins to keep it covered.
And the final look.

